Keeping You Safe Since 1970

1-888-326-9244

Favorites

Contact

Graphic Products
  • My Account
    No Account? Sign up
    Forgot password?
  • Cart ()
  • Printers & Supplies Printers
    Toro Max

    Toro Max

    NEW! portable all-in-one
    • Learn More
    • Toro Max Supplies
    Bronco Max

    Bronco Max

    NEW! reliable workhorse
    • Learn More
    • Bronco Max Supplies
    DuraLabel Kodiak

    DuraLabel Kodiak

    Multi-color, large format
    • Learn More
    • Kodiak Supplies
    DuraLabel Lobo

    DuraLabel Lobo

    Grab n' go labeler
    • Learn More
    • Lobo Supplies
    DuraLabel Toro

    DURALABEL TORO

    Mobile, stand-alone
    • Support
    • Toro Supplies
    DuraLabel Bronco

    DuraLabel Bronco

    Industrial, efficient
    • Support
    • Bronco Supplies
    DuraLabel Pro Series

    DuraLabel PRO 300

    Simple and reliable
    • Learn More
    • Pro Series Supplies
    Legacy Printers

    Legacy Printers

    Support and Supplies
    • Learn More
    • Shop All Supplies

    Quick Links

    All Printers

    Printer Kits

    Printer Supplies

    Printer Ribbons

    Accessories

    Printer Support

    Labeling Software

  • Safety Signs

    Compliance Signs

    • Chemical Signage
    • Confined Space Signs
    • Electrical Hazard Signs
    • Fire Signage
    • PPE Safety Signs
    • All Compliance Signs

    Facility Signs

    • Restricted Area Signs
    • Smoking Signs
    • Machinery Signs
    • Bathroom Signs
    • Clearance Signs
    • All Facility Signs

    Traffic Signs

    • Directional Signs
    • Exit Signs
    • Forklift Signs
    • Emergency Signs
    • All Traffic Signs

    Floor Signs

    • Blank Floor Signs
    • Exit Floor Signs
    • Fire Safety Floor Signs
    • First Aid Floor Signs
    • LOTO Floor Signs
    • All Floor Signs

    Related Resources

    PDF Icon EHS Manager's Guide
    PDF Icon OSHA Safety Signs Guide
    PDF Icon Labeling Your Facility for Safety
    PDF Icon Safety Labels vs. Signs
    SEE MORE
    Signs and Labels Banner
  • Floor Marking

    Floor Tape

    • 5S Floor Tape
    • Aisle Tape
    • Glow in the Dark Tape
    • Reflective Tape
    • Anti-Slip Tape
    • All Floor Tape

    Floor Signs

    • Blank Floor Signs
    • Exit Floor Signs
    • Fire Safety Floor Signs
    • First Aid Floor Signs
    • LOTO Floor Signs
    • All Floor Signs

    Floor Marking Shapes

    • Floor Marking Corners
    • Floor Marking T's
    • Floor Marking Footprints
    • Floor Marking Circles
    • Floor Marking Arrows
    • All Floor Marking Shapes

    Other

    • Discount Bundles
    • Floor Marking Accessories
    • Floor Laminate

    Lumen Projectors

    • Lumen Sign Projector
    • Lumen Line Projector
    • Lumen Accessories

    Related Resources

    PDF Icon Floor Marking Best Practices
    PDF Icon Floor Marking Color Chart
    PDF Icon What is Floor Marking?
    PDF Icon Floor Tape vs. Paint
    SEE MORE
    Floor Marking Banner
  • Pipe Markers

    Shop By Standard

    • ANSI A13.1 Pipe Markers
    • Ammonia (IIAR) Pipe Markers
    • Medical (NFPA 99) Pipe Markers
    • Marine (ISO 14726) Pipe Markers
    • European Pipe Markers
    • All Pipe Markers

    ANSI Pipe Markers

    • Fire Quenching
    • Flammable/Oxidizing
    • Toxic or Corrosive
    • Compressed Air
    • Various Water
    • All ANSI Pipe Markers

    Other

    • Pipe Marking Accessories
    • Valve Tags
    • Arrow Banding Tape

    Related Resources

    PDF Icon Pipe Marking Best Practices
    PDF Icon Facility Pipe Marking Guide
    PDF Icon Pipe Marking Basics
    PDF Icon Getting Started with Pipe Marking
    SEE MORE
    Pipe Marking Banner
  • COVID-19

    COVID-19 Solutions

    • Safety Signs
    • Printer Kits
    • Awareness Posters
    • A-Frame Signs
    • Sneeze Guards
    • All COVID-19 Solutions

    Social Distancing

    • Social Distancing Signs
    • Social Distancing Floor Signs
    • Social Distancing Floor Tape
    • All Social Distancing

    COVID-19 By Industry

    • Grocery & Retail
    • Medical & Healthcare
    • Office Settings
    • Restaurants & Food Service
    • Food Manufacturing
    • Construction
    • Manufacturing
    • Finance
    • Transportation
    • Education

    Related Resources

    Video Icon COVID-19 Safety At Work Webinar
    PDF Icon Social Distancing Reference Chart
    SEE MORE
    COVID Banner
  • Resources
  • Help
  • Free Samples
  • Quick Order
    Enter item SKU# and quantity
Graphic Products
  • My Account
  • Printers & Supplies
  • Safety Signs
  • Floor Tape
  • Pipe Markers
  • COVID-19
  • Resources
  • Help
  • Free Samples
  • Quick Order
  • Favorites
  • Contact Us
  • Back
  • MY ACCOUNT
  • Account
  • Orders
  • Track My Order
  • Addresses
  • Login & Security
  • Payment Methods
  • Carrier Accounts
  • Favorites Lists
  • Sign Out
  • Back
  • SIGN IN
  • No Account? Sign up
    Forgot password?
  • Back
  • Quick Order
Enter item SKU# and quantity
  • Back
  • Printers & Supplies
  • DuraLabel Toro Max
  • DuraLabel Bronco Max
  • DuraLabel Toro
  • DuraLabel Bronco
  • DuraLabel Kodiak
  • DuraLabel Lobo
  • DuraLabel PRO 300
  • Shop All Printers
  • Shop All Supplies
  • Shop All Ribbons
  • Labeling Software
  • Back
  • DuraLabel Toro Max
  • Toro Max Printer
  • Toro Max Supplies
  • Toro Max Ribbon
  • Toro Max Accessories
  • Toro Max Bundles and Kits
  • Toro Max Support
  • Shop All Printers
  • Shop All Supplies
  • Shop All Ribbons
  • Labeling Software
  • Back
  • DuraLabel Bronco Max
  • Bronco Max Printer
  • Bronco Max Supplies
  • Bronco Max Ribbon
  • Bronco Max Accessories
  • Shop All Printers
  • Shop All Supplies
  • Shop All Ribbons
  • Labeling Software
  • Back
  • DuraLabel Toro
  • Toro Supplies
  • Toro Ribbon
  • Toro Accessories
  • Toro Support
  • Shop All Printers
  • Shop All Supplies
  • Shop All Ribbons
  • Labeling Software
  • Back
  • DuraLabel Bronco
  • Bronco Supplies
  • Bronco Ribbon
  • Bronco Accessories
  • Bronco Support
  • Shop All Printers
  • Shop All Supplies
  • Shop All Ribbons
  • Labeling Software
  • Back
  • DuraLabel Kodiak
  • Kodiak Printer
  • Kodiak Supplies
  • Kodiak Ribbon
  • Kodiak Accessories
  • Kodiak Bundles and Kits
  • Kodiak Support
  • Shop All Printers
  • Shop All Supplies
  • Shop All Ribbons
  • Labeling Software
  • Back
  • DuraLabel Lobo
  • Lobo Printer
  • Lobo Supplies
  • Lobo Ribbon
  • Lobo Accessories
  • Lobo Support
  • Shop All Printers
  • Shop All Supplies
  • Shop All Ribbons
  • Labeling Software
  • Back
  • DuraLabel PRO 300
  • DLP 300 Printer
  • DLP 300 Supplies
  • DLP 300 Ribbon
  • DLP 300 Accessories
  • DLP 300 Bundles and Kits
  • DLP 300 Support
  • Shop All Printers
  • Shop All Supplies
  • Shop All Ribbons
  • Labeling Software
  • Back
  • Safety Signs
  • Compliance Signs
  • Facility Signs
  • Traffic Signs
  • Floor Signs
  • Shop All Safety Signs
  • Back
  • Compliance Signs
  • Chemical Signage
  • Confined Space Signs
  • Electrical Hazard Signs
  • Fire Signage
  • PPE Safety Signs
  • All Compliance Signs
  • Back
  • Facility Signs
  • Restricted Area Signs
  • Smoking Signs
  • Machinery Signs
  • Bathroom Signs
  • All Facility Signs
  • Back
  • Traffic Signs
  • Directional Signs
  • Exit Signs
  • Emergency Signs
  • Forklift Signs
  • All Traffic Signs
  • Back
  • Floor Signs
  • Blank Floor Signs
  • Exit Floor Signs
  • Fire Safety Floor Signs
  • First Aid Floor Signs
  • LOTO Floor Signs
  • All Floor Signs
  • Back
  • Floor Tape
  • General Floor Tape
  • Floor Signs
  • Floor Marking Shapes
  • Other
  • Shop All Floor Tape
  • Back
  • Floor Tape
  • 5S Floor Tape
  • Aisle Tape
  • Glow in the Dark Tape
  • Reflective Tape
  • Anti-Slip Tape
  • All Floor Tape
  • Back
  • Floor Signs
  • Blank Floor Signs
  • Exit Floor Signs
  • Fire Safety Floor Signs
  • First Aid Floor Signs
  • LOTO Floor Signs
  • All Floor Signs
  • All Floor Signs
  • Back
  • Floor Marking Shapes
  • Floor Marking Corners
  • Floor Marking T's
  • Floor Marking Footprints
  • Floor Marking Circles
  • Floor Marking Arrows
  • All Floor Marking Shapes
  • Back
  • Other
  • Discount Bundles
  • Floor Marking Accessories
  • Floor Laminate
  • Lumen Projectors
  • Back
  • Pipe Markers
  • Shop By Standard
  • ANSI Pipe Markers
  • Other
  • Shop All Pipe Markers
  • Back
  • Shop By Standard
  • Standard (ANSI A13.1) Pipe Markers
  • Ammonia (IIAR) Pipe Markers
  • Medical (NFPA 99) Pipe Markers
  • Marine (ISO 14726) Pipe Markers
  • European Pipe Markers
  • All Pipe Markers
  • Back
  • ANSI Pipe Markers
  • Fire Quenching
  • Flammable/Oxidizing
  • Toxic or Corrosive
  • Compressed Air
  • Various Water
  • All ANSI Pipe Markers
  • Back
  • Other
  • Pipe Marking Accessories
  • Valve Tags
  • Arrow Banding Tape
  • Back
  • COVID-19
  • COVID-19 Solutions
  • Social Distancing
  • COVID-19 By Industry
  • Shop All COVID-19 Solutions
  • Back
  • COVID-19 Solutions
  • Safety Signs
  • Printer Kits
  • Awareness Posters
  • A-Frame Signs
  • Sneeze Guards
  • All COVID-19 Solutions
  • Back
  • Social Distancing
  • Social Distancing Signs
  • Social Distancing Floor Signs
  • Social Distancing Floor Tape
  • All Social Distancing
  • Back
  • COVID-19 By Industry
  • Grocery & Retail
  • Medical & Healthcare
  • Office Settings
  • Restaurants & Food Service
  • Food Manufacturing
  • Construction
  • Manufacturing
  • Finance
  • Transportation
  • Education
  • Home
  • Resources
  • Articles
  • Arc Flash Hazard Analysis

Arc Flash Hazard Analysis

BY GRAPHIC PRODUCTS STAFF

minute read

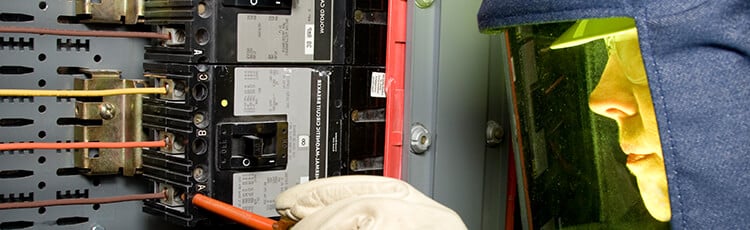
Conducting an arc flash hazard study is the cornerstone for worker safety when working with live equipment.

What Comprises an Arc Flash Hazard Analysis?

The study requires electrical engineering expertise and in-depth knowledge of a facility's electrical system. The purpose of an arc flash hazard study is to determine the location and severity of arc flash hazards and to suggest appropriate courses of action to minimize them.

IEEE 1584 guides on performing an arc flash study. Other methods exist as well, including calculations based on the formulas presented in NFPA 70E. All of the various methods for performing an arc flash study have certain similarities. In general, an arc flash study consists of the following steps:

  1. Collect system data including, for example, available maximum and minimum short circuit currents from the utility, protective device time-current curves, conductor characteristics (such as length, size, and material), motor impedance, equipment grounding states, system voltages, and so forth. Data collection requires a review of existing documentation--drawings, equipment specifications, short-circuit and coordination studies--followed by collecting data by hand to fill in any gaps. The data collection process is likely to be the most time-consuming and difficult portion of an arc flash hazard study.
  2. Model the system. After data has been assembled into an accurate and up-to-date one-line diagram, it is necessary to identify any variant modes of operation--alternative power sources, emergency or maintenance modes, effects of opening or closing ties, use of generators, shut-down of large motors, and so forth. Each mode of operation should be analyzed to determine if it results in hazard conditions that differ significantly from normal operations.
  3. Determine arcing fault currents for each piece of equipment from bolted fault current data, gap size, and other data. IEEE 1584 presents formulas for determining arcing fault currents, which are often around 50% of the bolted fault current values. Although most short-circuit analyses focus on single-phase events, it is conservative to calculate three-phase values for arc fault currents.
  4. Determine fault-clearing times using the time-current curves of upstream protective devices. IEEE 1584 recommends calculating fault-clearing times based on both 100% and 85% of the calculated arc fault current, to account for possible fluctuations. If the arc fault current falls in the steep portion of a protective device's time-current curve, a small decrease in current can cause a significant increase in clearing time. This in turn can greatly affect incident energy. The worst-case scenario should be used for subsequent calculations.
  5. Calculate incident energy using either the empirical formulas presented in IEEE 1584 or the theoretical formulas of NFPA 70E. In practice, the IEEE formulas are considered more accurate, while the NFPA 70E formulas produce relatively conservative results. Actual incident energy levels depend on a range of environmental conditions such as temperature, humidity, and equipment geometry, in addition to the values used in the equations. To calculate incident energy, a working distance must be assumed. This is the distance from the arc to a worker's face or chest. 18 inches is the most commonly assumed working distance, but more precise working distances should be used when available. IEEE 1584 Table 3 presents working usual distances for various types of equipment.
  6. Calculate arc flash protection boundaries, the distance at which incident energy is 1.2 cal/cm2. This is the energy needed to cause second-degree burns. NFPA 70E provides three acceptable methods for determining these boundaries:
    • Using NFPA 70E tables 220.2(B)(2) and 220.6(B)(9)
    • Using the formulas in NFPA 70E Annex B
    • Using the formulas in IEEE 1584

The data collected and calculated in the course of the study is put to various uses, including printing warning labels for equipment, determining required PPE, and training workers. Data may also be analyzed to optimize the system itself by modifying or replacing protective devices or making other changes to the system architecture.

Performing an arc flash study by hand is a forbidding task. However, arc flash software is commercially available to greatly decrease the work required and to allow easy integration of arc flash information with other aspects of a facility's electrical safety program.

Free Guide to Arc Flash Hazards

Our 130-page Guide to Arc Flash Hazards provides you the details needed to conduct your own Arc Flash Hazard Analysis. Download your free copy today!

Guide to Arc Flash Hazards
This free, 130-page, PDF is the most comprehensive guide available.

Related Resources

Arc Flash PPE Chart

Arc Flash PPE Chart

Quickly understand the system of Arc Flash PPE categories used in NFPA 70E.

Download
Arc Flash Labeling

Arc Flash Labeling

Learn the legal requirements and expert recommendations for creating effective arc flash warning labels.

Download
Arc Flash PPE

Arc Flash PPE

Understand the types of PPE that are used for arc flash protection, and learn how to choose the right gear.

Read
  • This free, 130-page, PDF is the most comprehensive guide available.
Get the latest deals straight to your inbox
Trusted by These Companies
Starbucks
GM
Du Pont
Amazon
Disney
3M
Pepsi
NASA
Chevron
AT&T
Toyota
Coca-Cola
UPS
Target
  • Graphic Products, Inc.
    9825 SW Sunshine Ct
    Beaverton, OR
    97005 USA

  • Business Hours:
    Monday - Friday
    5:30am - 5pm Pacific

  • 1-888-326-9244 (U.S./Canada)
  • +1-503-644-5572 (International)
  • Products
  • Printers
  • Printer Supplies
  • Safety Signs
  • Safety Labels
  • Floor Marking
  • Pipe Markers & Tags
  • Support
  • Shipping & Returns
  • Manage Account
  • Printer Support
  • Warranties
  • Content Usage Guidelines
  • Resources
  • Resource Center
  • Guides
  • Articles
  • Video Library
  • Safety Blog
  • Infographics
  • Webinars
  • Company
  • About Us
  • Careers
  • Become a Dealer
  • Find a Dealer
  • Press Room

Need Help?

Give us a call at 1-888-326-9244 and speak with an expert.

Customer Reviews
  • Copyright © 2023
  • All Rights Reserved
  • Terms and Conditions
  • Shipping and Returns
  • Privacy Policy
  • Do Not Sell My Personal Data