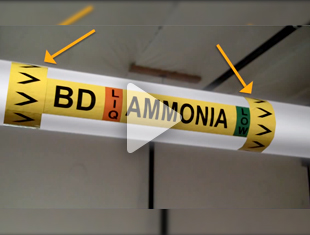
Arc flash labels effectively communicate arc flash dangers. DuraSuite Labeling Software is an excellent source for creating arc flash labels.
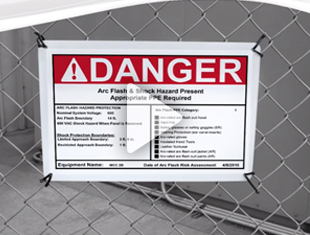
Open DuraSuite software and select the arc flash module and a label size. Your label template is displayed. For this example we've chosen a 4 inch by 6 inch arc flash template. Enter values in the Hazard Protection, Shock Protection Boundaries, Minimum Arc for PPE, and Equipment ID fields. Select individual personal protective equipment, or PPEs, from the right side of the template. To add a new PPE item, click the Add New PPE button on the DuraSuite toolbar. Select the 'Add PPE' tab on the window that appears and enter the personal protective equipment you want to add in the PPE Name field. The Date of Analysis drop-down menu, located on the bottom-right of the template, is turned on and off by clicking Show Date on the Arc Flash toolbar. You can choose between Danger or Warning headers on the Print Header drop-down menu.
Place a grid around label sections by clicking Grid. Now, save the information you entered by clicking the save icon on the DuraSuite menu bar. The arc flash module lets you import arc flash data from your personal files. To start, click the Import Data icon on the DuraSuite toolbar. The Import Data tool supports Microsoft Access, comma-separated value and Microsoft Excel files. For this example we've chosen an Excel document. A dialog box appears asking if the cells in the first row are column headers. Determine if they are and answer Yes or No. A blank arc flash template appears with empty text fields. Below the template is a table of data read from the input file. To the right is a list of column headers. Click and drag column headers to template. The fields under PPE correspond to the PPE checkboxes. A checkbox will remain empty if its corresponding field is left blank, or if it contains any of these listed values. After populating the Equipment ID and any additional fields, click Next. A newly generated arc flash label now appears under the Review Data tab. Examine the label to ensure all fields were placed correctly. If they were not, click Previous and correct them. Click Next and review the data again. When satisfied all fields are correct, click Next and proceed to the Conflicts tab.
For a record to be saved to the database, its Equipment ID must be unique. Each non-unique record represents a conflict that must be resolved by overwriting existing data, ignoring new data, or renaming the Equipment ID. When all rows of conflicted data are resolved, they disappear. When done, click Finish. Your imported data is stored in the arc flash database. You can access the imported labels by the toolbar's navigation options.
To print your labels, select file, then print. Select your DuraLabel printer and then click Preferences. Under the Page Setup tab, set orientation to landscape. Under the stock tab, choose labels with gaps from the type drop-down menu, then click OK. Select the number of labels you want and click Print. Your labels will now print to the specifications you chose. For more information about DuraSuite software, Call 1-888-326-9244 or visit DuraLabel.com.