In this video we'll demonstrate how to:
- Remove old floor marking
- Correctly prepare a surface for new tape installation
- How to install PathFinder tape in a straight line as well as
- How to properly outline a door or exit
To skip ahead, use the annotations located at the bottom of the screen.
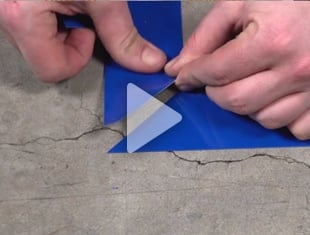
If there is old or unwanted floor marking tape or painted lines that need removing-use a flat-edged paint scraper or putty knife. Remove tape by chipping away at each corner of a line. A heat gun can be used if a paint scrapper alone is ineffective and a non-citrus based degreaser will remove all leftover adhesive residue.
The first step in successful installation of PathFinder tape is to ensure that the application area has been properly cleaned and dried. A dry, clean application surface allows for the tape's adhesive to cure completely. After clearing dust and debris-use a non-citrus based de-greaser on any tough stains or oily spots on the floor. Then, mop the area with warm soapy water. Leave time to dry and you're all ready to apply PathFinder floor marking tape.
There are no exact regulations for floor marking, so the first rule of thumb is to stay consistent.
In this example, we will be using PathFinder Rigid Tape designed for long term industrial use to create a line six inches from the storage rack. Measure out your beginning and end points using a ruler or tape measure. Then, using a chalk, laser or reference line, following the intended path to assure straight application.
Remove the adhesive liner at the beginning of the roll and apply approximately 10 to 12 inches of tape to the floor. Smooth the tape out and apply even pressure to ensure a strong adhesive bond.
Following the reference line and applying light tension, begin to remove the adhesive liner in sections approximately 3 to 5 feet at a time and begin to install the tape. Applying in short sections allows for the accurate installation, no wasted tape and helps avoid bubbles or creases. Continue this process until the job is done.
Once PathFinder tape has been successfully installed, allow 24 hours for the adhesive backing to fully cure before putting it into use.
Make sure the application area has been properly cleaned. This involves making sure there are no oily areas, dust or dirt.
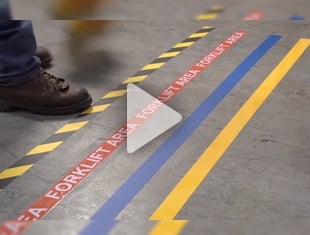
Remember that there are no exact regulations for floor marking, so staying consistent is key. In this example we'll be using PathFinder hazard stripped Flex tape.
Use the frame of the doorway as the guidelines. After aligning with a T or square to ensure accurate angles, place PathFinder tape on either side of the door frame, creating perpendicular lines. Then, if the door swings in, find the maximum distance the door will swing, if it swings out- simply select the desired distance and lay the cross piece down. Create two 90 degree corners at the intersections and smooth out the remaining end pieces. If you need assistance creating corners using PathFinder- follow the link.
And with that, your doorway is safely designated- alerting workers to keep an exit way clear or to beware of constant traffic.
If you have any questions or need help with a unique labeling challenge; you can speak with one of our customer service specialists. Our service hours are 5:30 a.m. to 4 p.m. Pacific Standard Time, Monday through Friday. Call us at 1-888-326-9244 or to can chat live online just go to floormarking.com.